Guni provides you with the facility to send Automated response to replies that you received through Automated Workflows.
Benefits of Automated Response
- Send response within seconds.
- Allow you to set conditions for response message trigger based on the reply.
- Improve engagement through a single effort.
Workflows only work on Dedicated Numbers.
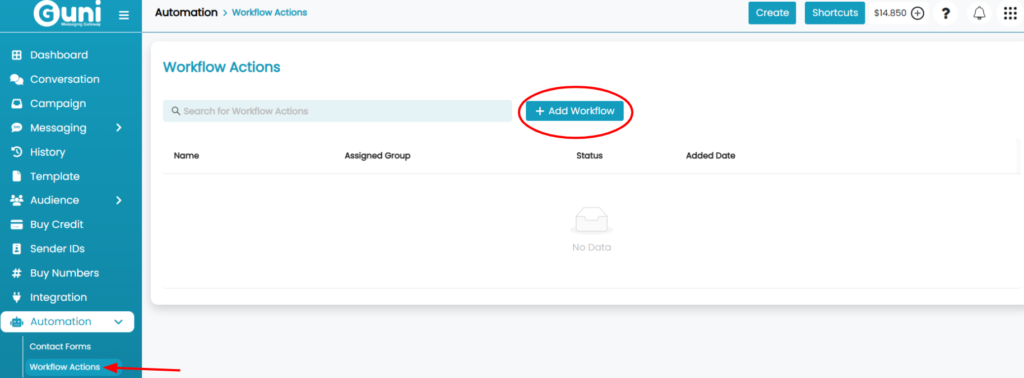
How to Trigger Automation Workflows?
- Click on ‘Automation’ -> ‘Workflow Actions‘.
- Click on ‘Add Workflow’.
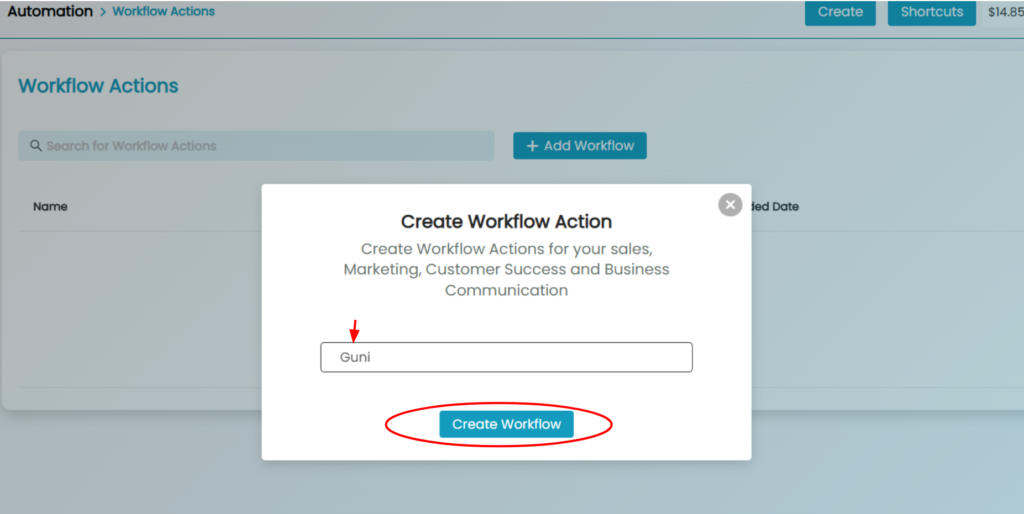
- Enter the ‘Name of the Workflow’.
- Click ‘ Create Workflow’.
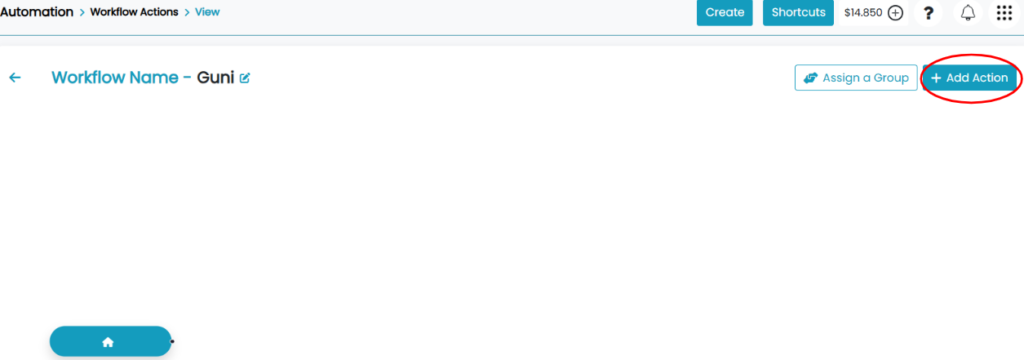
- Then click on ‘Add Actions’.
Note – If you wish to add personalisation in your automated messages, assign group to workflow and create actions accordingly.
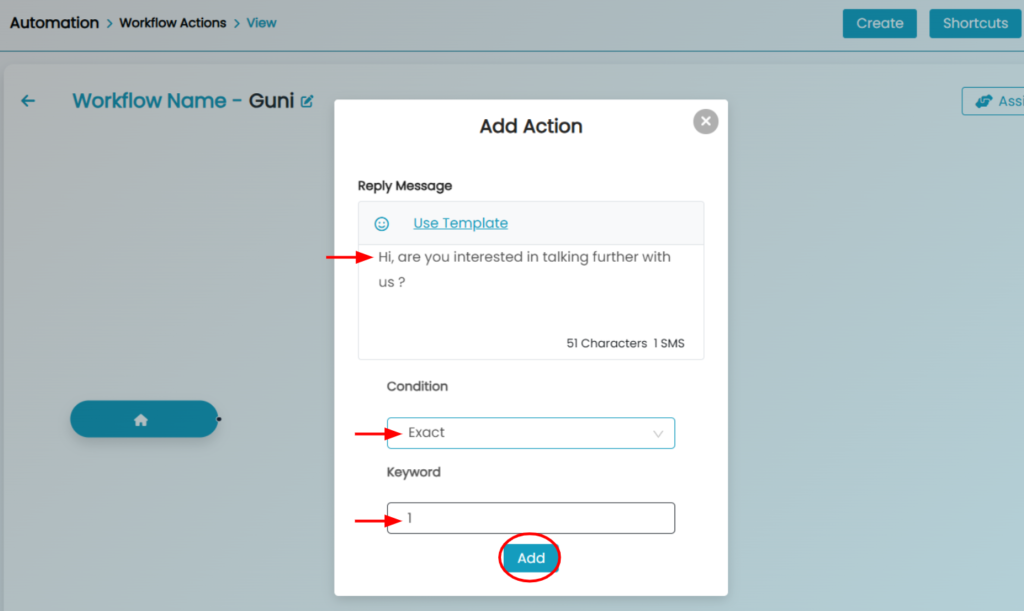
- Click on ‘+Add Actions’.
- An ‘Add Action’ box will appear.
- Type the response you want to send on reply.
- Choose the condition for that message response to be triggered
- Exact – Response will be triggered if the reply is exact same as Keyword you provided.
- Contains – Response will be triggered if the reply is containing the Keyword you provided, anywhere in the content.
- Default – Will trigger at any reply without any keyword, but only once in a day (24 hours).
- Click on ‘Add’.
If second message from same contact doesn’t have a matching condition, then no response will be automated.
- Add all the required actions one by one.
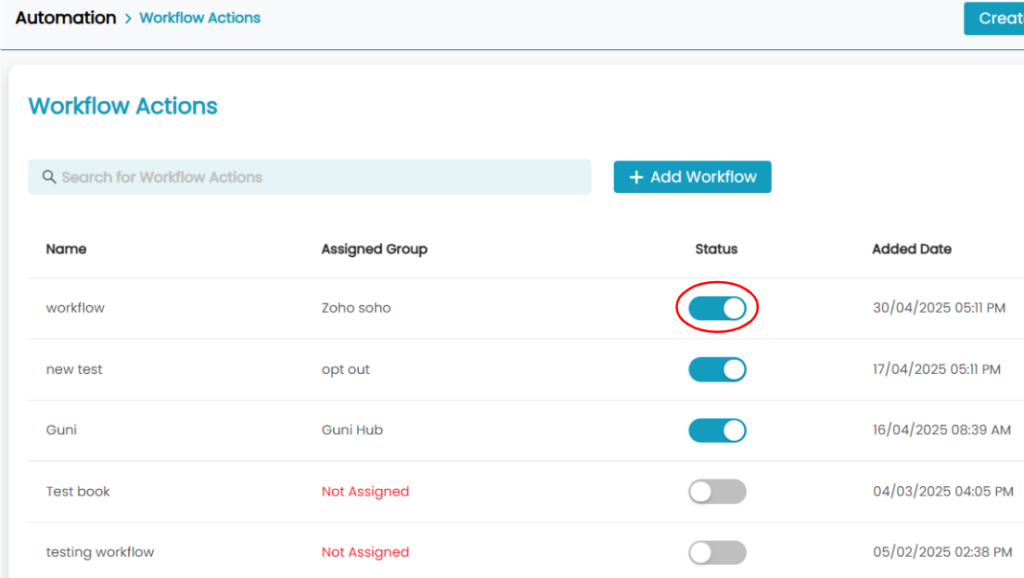
You can choose not to assign any group, in case you wish to generate automated responses for every single person that replies on your Dedicated Number. Just toggle the workflow ‘ON’.
- Open the ‘workflow‘ page again.
- Turn ‘ON’ it’s status.
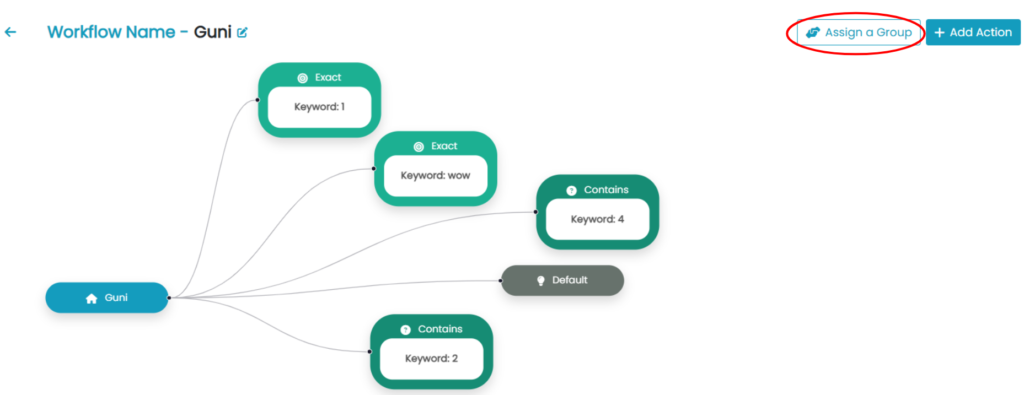
Assigning a Group (Optional) –
If you assigned a group to your workflow then it will work for the contacts included in that group only.
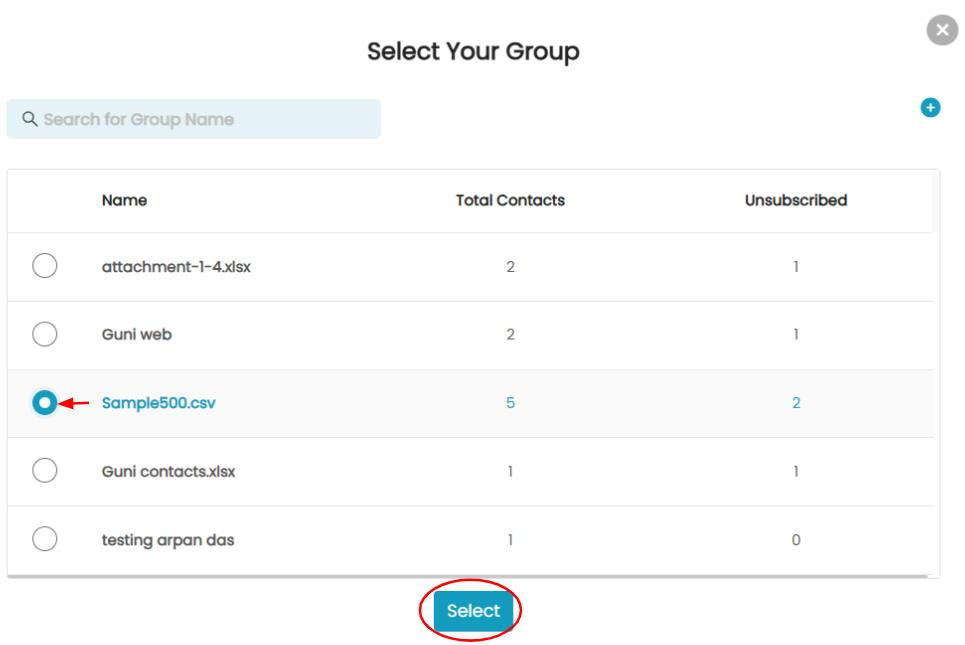
- Select the required group.
- Click on ‘Select’.
Want to add ‘Personalisation’ your automated message?
Note – You can add personalization in your automated reply if you have assigned a group to workflow. You can edit the message or assign group first to include it.
- Click on the ‘Condition’ you wish to edit or ‘Add Action'(if you create a new one).
- Click on ‘edit’ icon.
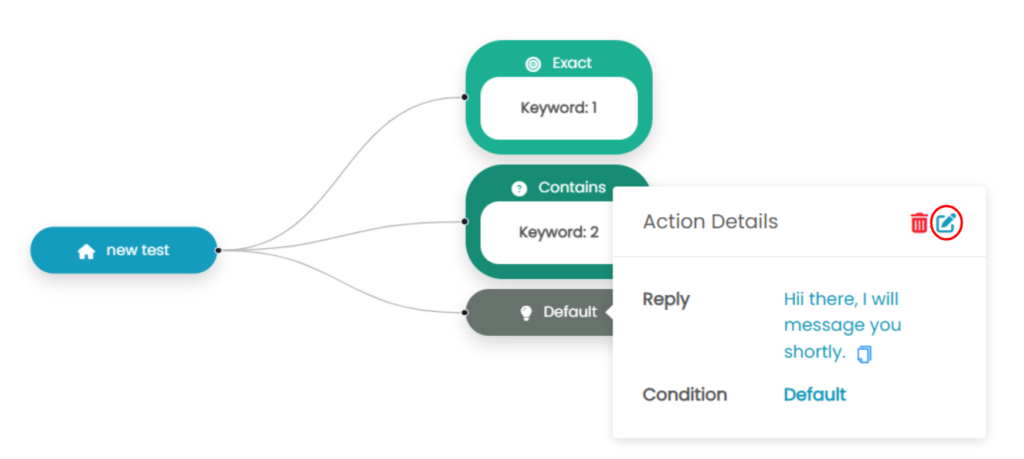
- An ‘Update Action’ panel will appear.
- Click on ‘Personalise’ and choose required personalisation fields.
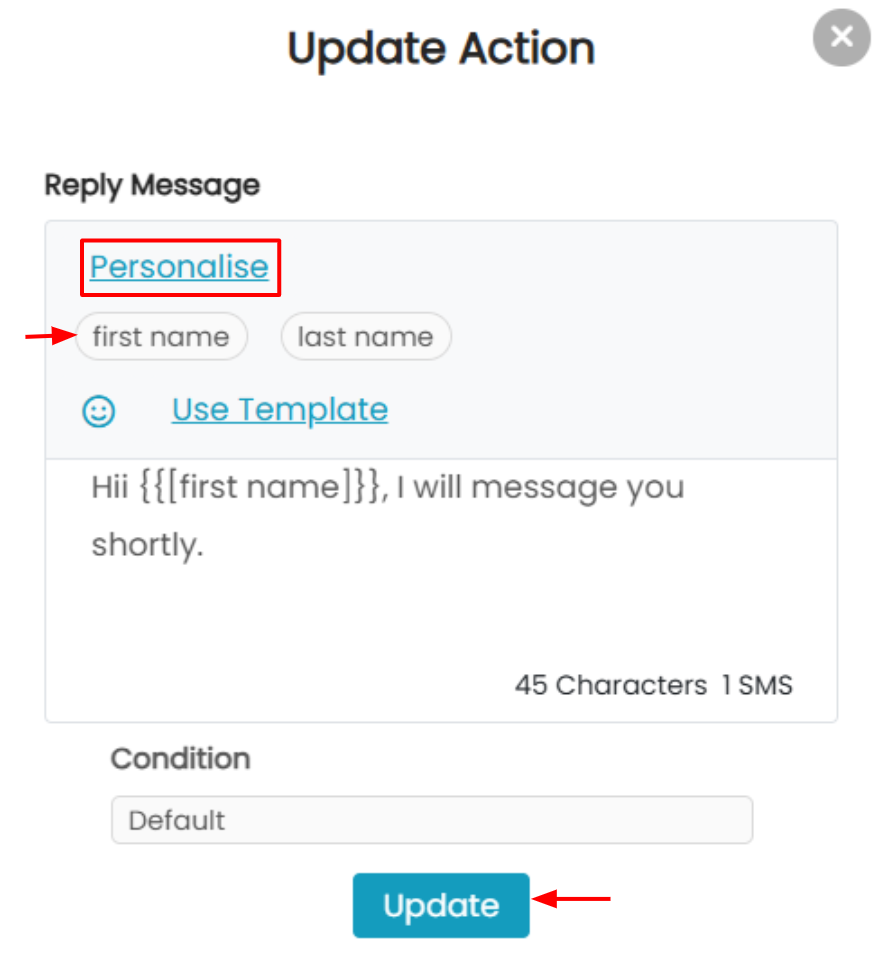
- Click on ‘Update’ once you are done updating.
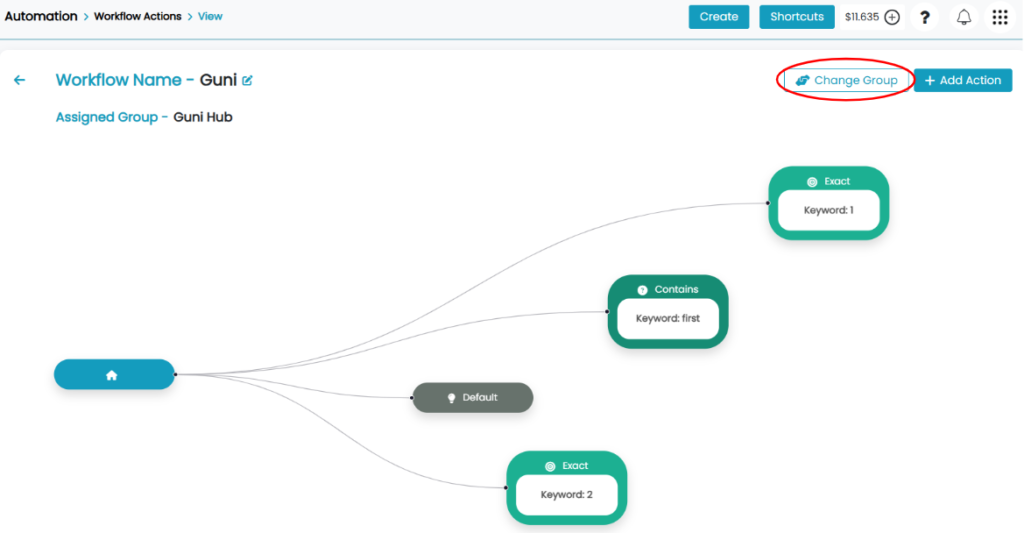
Need to Change Group?
- If you need to change the group, click on ‘Change Name’ appeared at place of ‘ Assign Group’.
- Select the new group, click Select.
Delete Workflow
- Click on ‘trash’ icon present on front of each workflow.
- Click ‘ Continue’ for confirmation, then ‘Ok’.