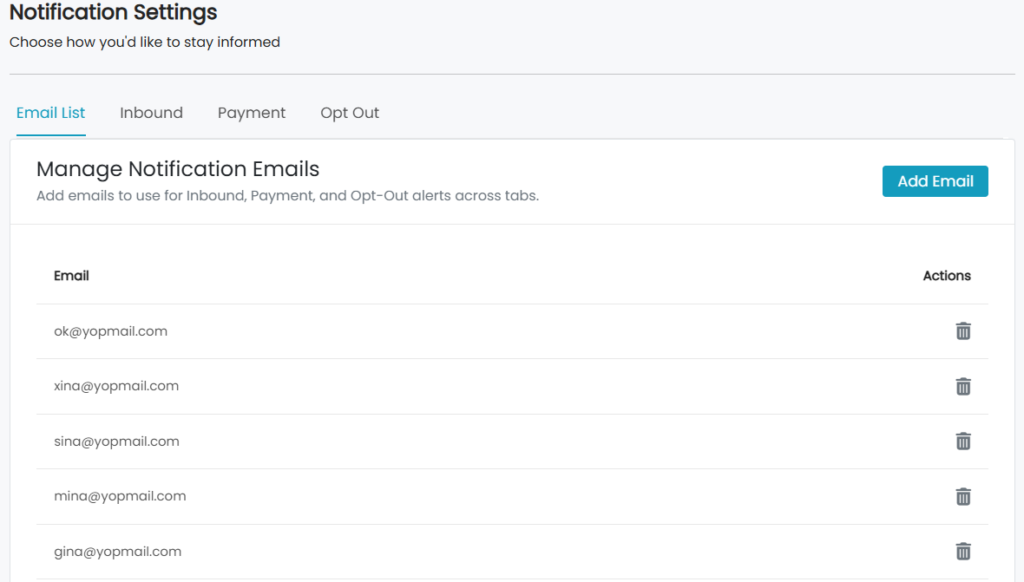
Guni provides you with “reply settings” so that you can choose whether on which email you will be notified about anything particular. This feature let you receive payment notifications, replies and opt-out information at different emails as per your choice.
Reply Settings –
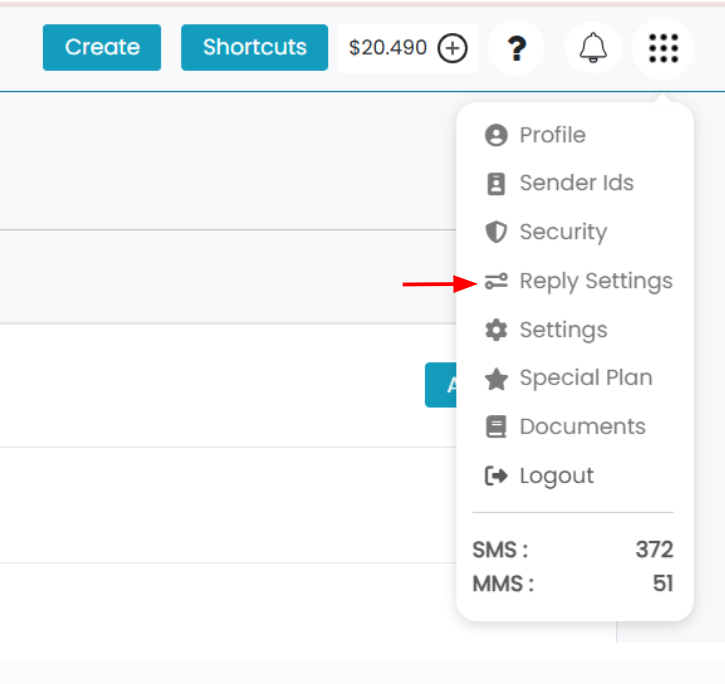
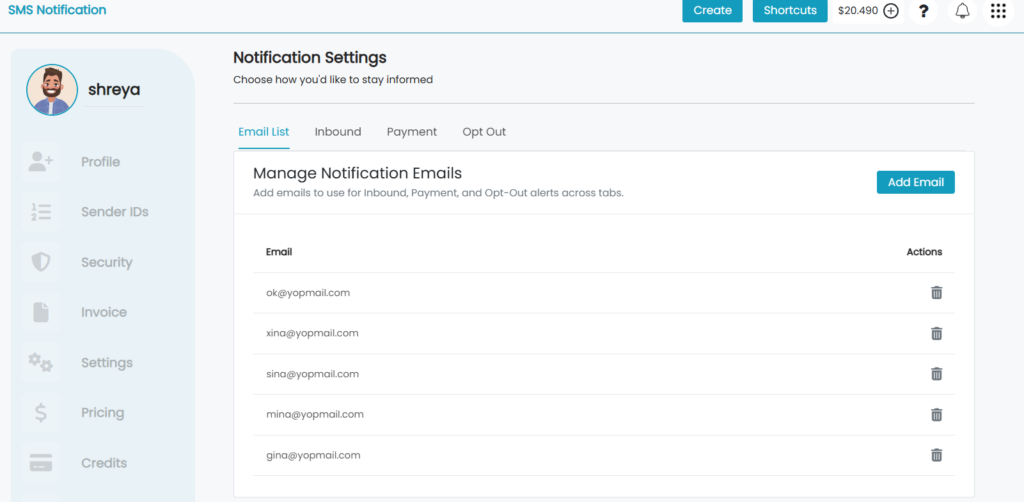
- Click on the profile menu -> ‘Reply Settings’.
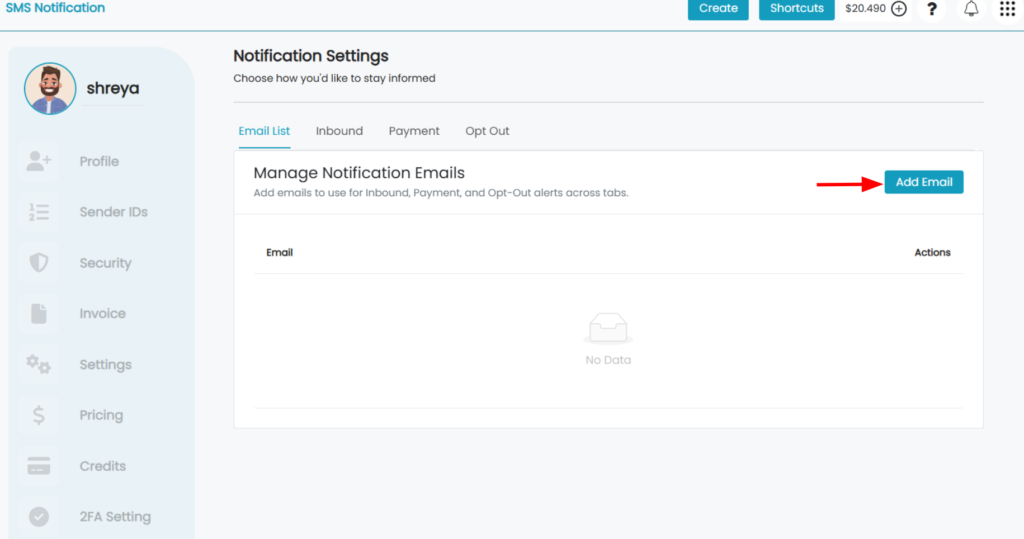
- Click on ‘Add Email’ in ‘Email List’ tab.
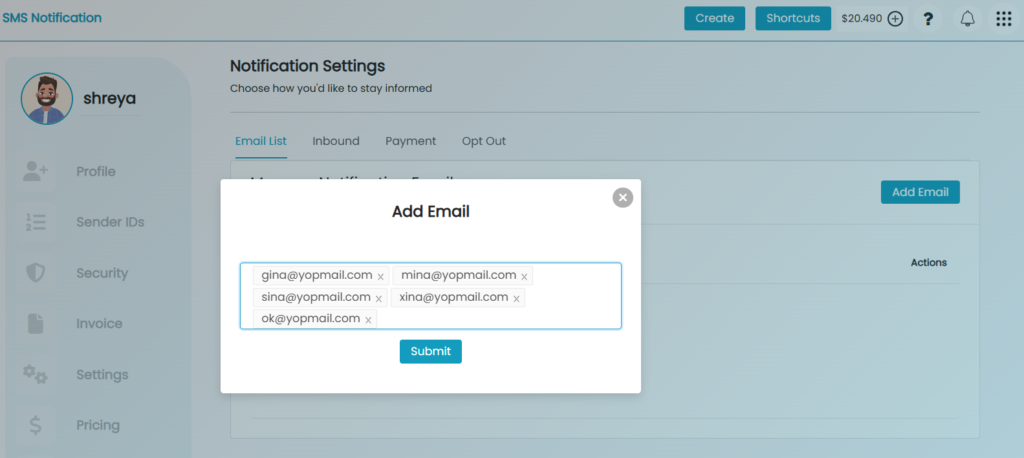
- Add the emails.
- Click on ‘Submit’.
- All the emails you entered will be listed.
Inbound Notifications –
This will help you set email notification preferences for responses/ inbound messages you receive on Shared Number and Dedicated number sent messages.
- Click on ‘Inbound Tab’.
- Turn ‘ON’ the Notification option.
- Then click on ‘Configure Email’.
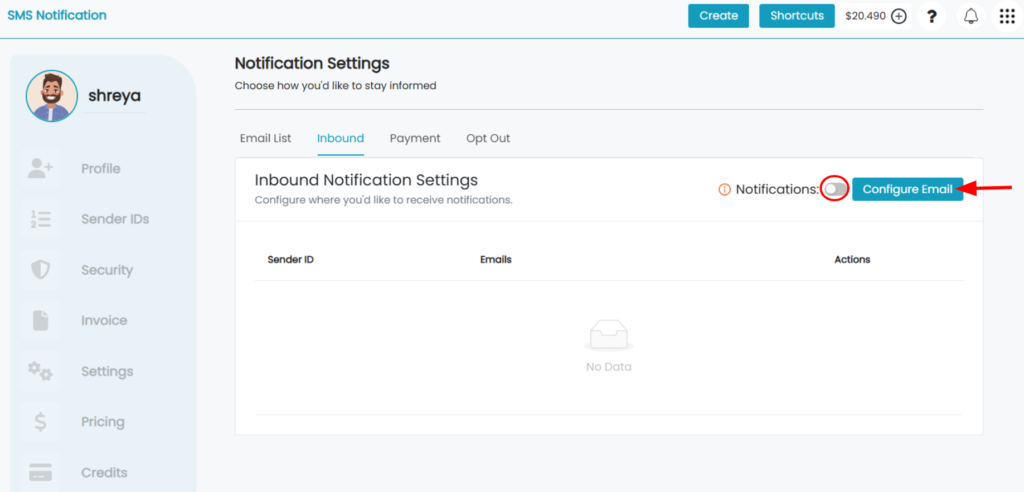
- Select the sender ID whose inbound replies are to be notified on the configured email.
- Shared Number – Random Number from a pool of numbers. A reply after one week or less also may not be notified.
- Dedicated Number – Unique number with guaranteed response receiving no matter how late it was sent from the campaign. You must subscribe one in order to use.
- All Inbound – Notify for all the replies, no matter the sender ID.
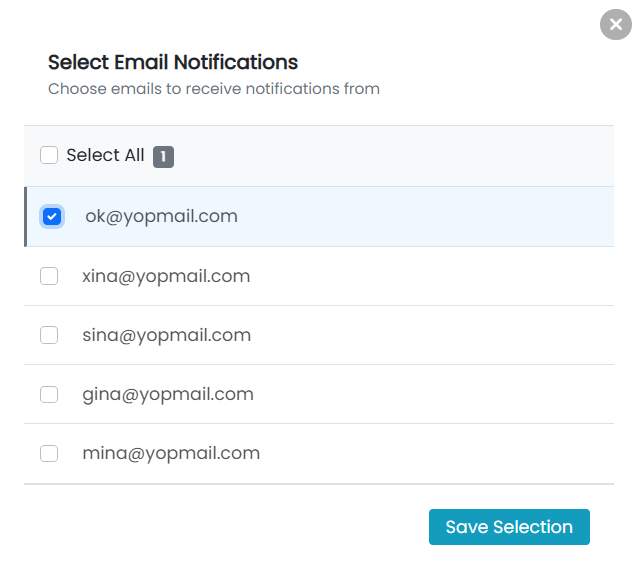
- Select one or multiple emails from the email list as ‘Email recipients’.
- Click on ‘Add Recipients’.

Messages sent through business name can’t be replied and a reply on your personal number cannot be linked to Guni platform for reply setting.
Payment Notifications –
- For all the payment related notifications, including –
- Auto credit
- Low balance alert
- Dedicated Number purchase
- Failure of card payment for auto credit or dedicated number…etc.

- Click on ‘Configure Email’.
- Select the email/emails you wish to be notified on.
- Click on ‘Save Selection’.
Opt-Out Notifications –
This will help you set email notification preferences for any optout that may happen on your campaign.
- Click on ‘Opt-out’ tab.
- Click on ‘Configure Email’.
- Select the email/emails to get notification on opt out by any contact.
- Click on ‘Save Selection’.

If you don’t choose any email in the setting, then it will be considered turned OFF by default. You won’t receive any optout or payment notification if one happens.
Edit Notification Settings –
- You can edit or change the email for receiving notification by clicking on ‘Edit’ icon..

- You can delete and add email in the listed emails anytime through the options provided.